Profile wrapping geometry predicts finish quality better than film brand, adhesive brand, or almost anything else on the line. A flat casing wraps clean on nearly any setup. Place a tight outer radius next to a deep cove, with a 3mm web on the same profile, and test every variable at once.
Over more than 35 years of experience wrapping window, door, siding, and molding profiles, we see the same handful of shapes cause most of the lifting, wrinkling, and starved glue lines we are called to fix.
What Profile Wrapping Geometry Actually Means
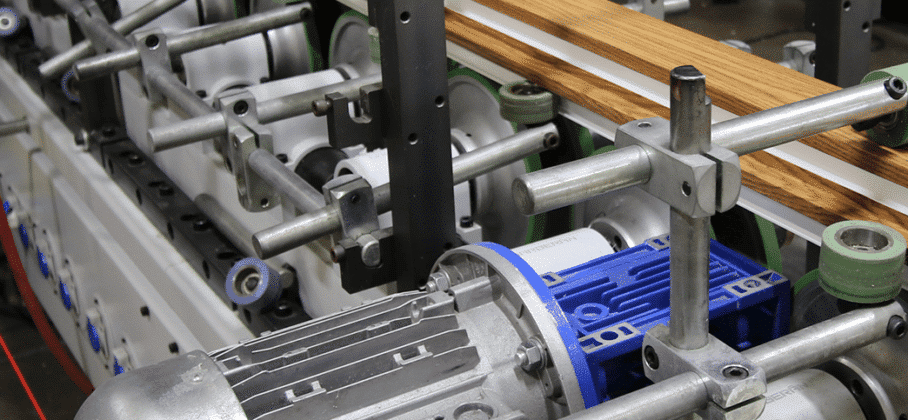
Profile wrapping is the process of bonding a decorative film or veneer to the fully contoured surface of a linear profile using heat, adhesive, and a series of shaped pressure rollers. Profile wrapping geometry is defined as the combination of radii, angles, grooves, webs, and returns in a profile’s cross-section that determines how the film must bend, stretch, and seat as it passes through the machine.
Two terms come up constantly on the floor. A wrap angle is defined as the total angular change the film must undergo around a feature, so a square outside corner has a 90-degree wrap angle. A glue line is defined as the continuous layer of adhesive between film and substrate, and the finish is only as good as the thinnest point in it.
Film does not slide onto a profile. It is pressed into it, feature by feature, by rollers shaped to that cross-section. Every corner adds stretch. Every groove adds a place for the film to bridge rather than seat.
The Geometry Features That Cause the Most Trouble
Tight Outside Radii
A sharp outside corner is where film thins the most. As it stretches around the radius, the embossing flattens, and the color often reads lighter at the corner because more substrate shows through. Tight radii also cause later delamination because the stretched film carries residual stress that pulls against the bond each time the part warms. If the design allows even a small break rather than a knife edge, both the finish and the long-term bond improve.
Deep Grooves, Coves, and Inside Corners
Inside features fail differently. Instead of thinning, film bridges, spanning the opening rather than seating into the bottom. A bridged groove looks acceptable coming off the line but turns into a shadow line or lifted edge weeks later. Seating film into a deep, narrow groove requires a roller shaped for it, the correct film temperature, and enough dwell time for the adhesive to grab before the film springs back. This is routine work on beadboard profiles and soffit profiles with vent detail.
Narrow Sections and Thin Webs
Narrow profiles do not provide rollers with enough surface area for even pressure, and thin webs flex rather than support the rollers. The result is uneven adhesion along the length, sometimes with visible roller marks. Machine capability matters more than technique here. Our smallest line handles profiles as narrow as 1 inch, making narrow trim viable without hand finishing.
Undercuts, Returns, and Wrap Legs
A wrap leg is the short section of film carried around the back edge of a profile and pressed into a groove or against a return so the film edge is hidden and mechanically locked. Undercuts and returns are where most edge lifting starts because film must reverse direction with almost no roller access. A small lock groove at the back gives the film somewhere to terminate and holds up far better than asking film to stop on a flat back face.
Profile Geometry Problems, Likely Causes, and Corrections
| Symptoms | Geometry Involved | Most Likely Cause | Practical Correction |
| Film lifting at a back edge | Return, undercut, or wrap leg | No lock groove, or insufficient roller access at the reverse | Add a back lock groove, add a dedicated wrap leg roller |
| Wrinkles in a cove | Deep groove or inside corner | Film cooling before it seats, or too much line speed | Raise film preheat, slow the line, add a shaped seating roller |
| Shadow line in a groove | Narrow deep groove | Film bridging instead of seating to the bottom | Shaped roller matched to the groove, longer dwell |
| Color lighter on a corner | Tight outside radius | Film thinning and substrate showing through | Increase the radius, choose a film with higher elongation |
| Uneven bond along the length | Thin web or narrow section | Substrate flexing under roller pressure | Support tooling, reduce pressure, use a narrower line |
| Edge delamination weeks later | Sharp corners plus exterior heat | Residual film stress plus thermal cycling on a thin glue line | Larger radii, adhesive with higher heat resistance |
How a Line Gets Set Up for a Complex Profile
Complex geometry is not wrapped by pushing harder. It is wrapped by matching three things to the cross-section.
Roller Tooling Matched to the Cross Section
Every meaningful feature needs a roller that pushes film into it at the right angle and in the right sequence. A profile with eight features and four rollers will always leave two or three features unseated. Tooling costs money but is almost always cheaper than a rejected production run.
Adhesive Open Time and Application Temperature
Open time is the window after adhesive application during which film can still be pressed into place and form a full bond. Complex profiles need more because film has further to travel before the last feature seats. Adhesive selection and application temperature are the levers to pull and should be part of the setup conversation before the first trial.
Line Speed and Film Choice
Faster is not better on a complex profile because every additional feature demands dwell time. Film matters too. Higher elongation follows tight radii with less thinning, but films that stretch easily can distort an embossed grain. That tradeoff is decided per profile, not per program.
Design Rules That Make a Profile Easier to Wrap
- Break sharp outside corners with the largest radius the design tolerates.
- Give grooves a slight draft rather than parallel walls so film can seat.
- Add a back-lock groove wherever a film edge must terminate.
- Keep a deep cove away from a tight outside radius.
- Keep webs thick enough to resist flexing under roller pressure.
- Share the actual die drawing, not a rendering, at the quoting stage.
How Wrapped Finish Quality Gets Verified
Visual inspection catches bridging and wrinkling but does not catch a weak bond that fails in six months. Quality control on wrapped profiles pairs appearance checks with destructive testing on samples pulled from the run.
Peel testing is the most representative laboratory method for a laminated profile. ASTM D903, the standard test method for peel or stripping strength of adhesive bonds, determines comparative peel strength at a constant rate of jaw separation. ASTM D3359 rates adhesion by tape test using Method A above 125 micrometers and Method B below it, though the standard notes the method only evaluates lower levels of adhesion on a zero-to-five scale.
Fenestration work adds a specification the laminate itself has to clear. FGIA published AAMA 307, the specification for laminates used on AAMA-certified profiles, covering weathering, chemical resistance, detergent resistance, and sealant compatibility, while AAMA 303, the voluntary specification for rigid polyvinyl chloride exterior profiles, addresses dimensional stability, impact resistance, weatherability, heat resistance, and heat buildup.
Get Precision Finishing for Complex Profiles
Complicated cross sections need a range, not just skill. We operate 25 profile-wrapping lines across Texas, Nevada, and Ohio.
Our equipment lineup is intentionally varied. One line is built for profiles as narrow as one inch, another for standard PVC vinyl extrusions including sash, head, jamb, and sill, and a third for wood, MDF, and HDF moldings.
A difficult profile is assigned to the machine that suits it, rather than being forced through whatever line is open. We apply the same logic to windows and doors, exterior siding, plastics, and metal profiles. If you have a complex profile and want a candid read, bring it to our profile wrapping team.
Contact us today with your finish requirements.
FAQs
Can any profile shape be wrapped, or are some shapes impossible to wrap?
Most linear profiles can be wrapped, but some cross-sections cannot be wrapped to an acceptable standard without a design change. The limiting factors are film elongation, roller access to each feature, and whether the film has a termination point at the back of the profile. Shapes combining a knife-edged outside corner with a deep, parallel-walled groove are the usual problem cases because one feature demands maximum stretch while the other demands maximum seating pressure. The practical step is a cross-section review before tooling is committed, which our profile-wrapping team performs from the die drawing rather than a rendering.
What is the minimum radius for profile wrapping?
There is no single industry minimum because the achievable radius depends on the film’s elongation at wrapping temperature, the substrate, the adhesive, and how much embossed texture the finish must retain. A highly elongating plain-color film will follow a tighter radius than a deeply embossed wood grain, which visibly distorts when stretched. Rather than designing to a number found online, send the cross-section and target finish to your wrapping supplier and get a trial on the actual film. Radii marginal in the lab tend to fail in the field when thermal cycling stresses the bond.
Why does wrapped film lift at the corners after installation?
Corner lifting almost always traces back to one of three causes: film overstretched around a tight radius, carrying residual stress; an adhesive with insufficient heat resistance for the service temperature; or an edge terminating on a flat back face with no lock groove to hold it. Heat accelerates all three, which is why dark exterior profiles show it first. Diagnosis starts by cutting a cross-section and measuring glue line thickness at the failure point, since a starved glue line at a corner points to geometry and process rather than the adhesive itself. Exterior profiles should also be checked against the applicable industry specification for laminates on certified profiles.
Does profile geometry change the cost of wrapping?
Yes, usually more through tooling and line speed than material. Each meaningful feature on a cross-section may require its own shaped roller, and complex profiles run slower because every feature needs dwell time to seat properly. A profile with twelve features can run at a fraction of the speed of a flat casing on the same machine. Manufacturers who involve their wrapping supplier at the design stage often recoup the cost several times over because small changes to radii and groove walls can increase line speed without altering how the finished part looks.
Can a wrapped profile be repaired if the film lifts in the field?
Field repairs on wrapped profiles are limited and rarely restore original performance. Reheating and rebonding a lifted edge can work cosmetically on a short section. The adhesive in the surrounding area has already cured and will not rewet uniformly, so the repair tends to be a temporary hold rather than a permanent fix. For anything beyond a minor edge, replacement of the affected piece is the honest recommendation. The better investment is prevention through cross-section design, proper adhesive selection, and QC sampling during the production run.